

Tiles are one of the important elements of the interior designing of your home. They are not only limited to add beautiful look and feeling to your space but also acts as a protective surface area of your house. Also, they can be placed anywhere in the house, from your bathroom to your kitchen or to your walls and floors. They are an easy and cost-effective way to update any space. Though they don’t quite break or crack easily, it is pretty simple to replace a broken tile. Therefore, by any accidents if you have a broken or cracked tile in your home, this article provides effective tips on how to replace a broken tile.
Tools Required
Before you begin, it is important to know what kinds of tools are required to replace a broken tile. Here are the list of tools and materials you will need to replace a cracked tile without damaging others around it.
- Identical tile(s)
- Carbide tipped scoring knife
- Painter’s tape
- Drill
- Chisel or flat-blade screwdriver
- Hammer
- Thin-set mortar
- Grout powder
- Notched trowel
- Flat trowel
- Sponge
- Safety glasses
- Protective rubber gloves

Step-By-Step Guide to Replacing a Broken Tile
You might be making a mistake if you are ignoring a broken tile in your home. It not only makes a bad impression among your guests but also possess a safety risk in your home. Thus, if you are wondering how to replace a broken tile, our step-by-step guide will help you to remove the broken tile or tiles, and replace them to look as good as new.
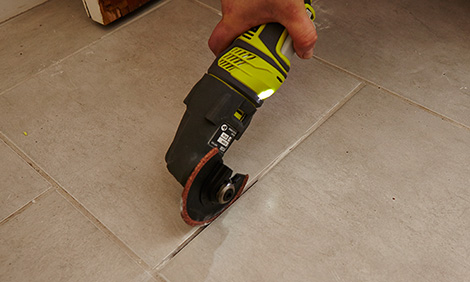
Step 1: Remove the Grout
The first step is to remove the grout that is around the broken tile. Make sure to wear a protective gloves and glasses. Also, be careful while removing the grout as you can damage the neighboring tile. Use a carbide-tipped scoring knife for this purpose.
Step 2: Loosen the Tile
After you have removed all the grout, you should apply the painter’s tape around its edges. You can even tape around neighboring tiles to ensure they remain intact. After this, you can break the broken tile into smaller pieces using a drill machine.

Step 3: Remove the Broken Pieces
While removing a ceramic tile, take a narrow chisel or a flat-blade screwdriver and place its tip against the center of the tile. Then gently hit the other end of the tool with a hammer to carve out the broken tile pieces. However, if you are removing a porcelain tile, it will require a little more effort since they are harder and denser.
After you have removed the pieces, use a wider chisel to get rid of the thin-set mortar. Before you replace a broken tile, remember that the cement backer board underneath the tile must be clean of any material.

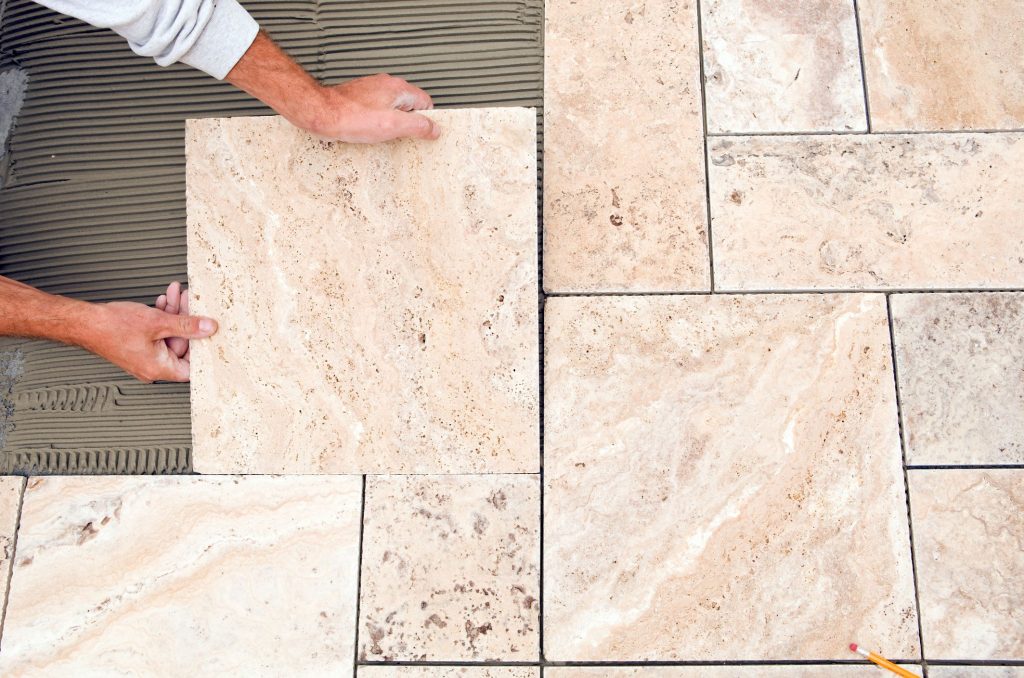
Step 4: Install the New Tile
Now, it’s time to fill the empty tile pocket with the mix of a small amount of thin-set mortar. Follow the manufacturer’s instruction and use a notched trowel to apply it. After this set the new tile in place and press it down with the flat of your palm. This will ensure that it is at level with the surrounding tiles. Make sure the tile has even spacing on all four sides. You can even use a tile spacer for better result.
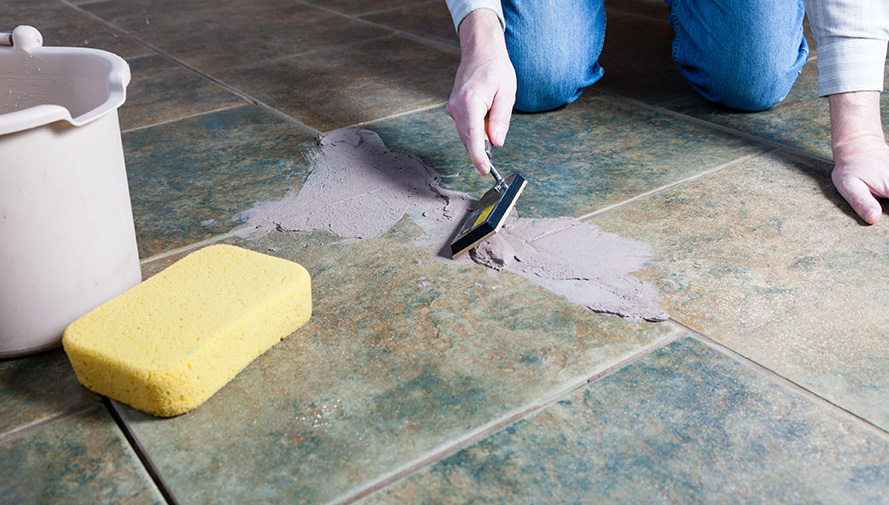
STEP 5: Mix and Apply The Grout
Wait for maximum 2 hours to for the thin-set to cure. Then, you can apply grout. As per the packaging instruction, you can mix a small quantity of grout and apply it to the joints around the tile. Make sure you clean the excess material from the tile as soon as possible because grout can dry within minutes. Damp sponge can be a great help for this type of work. You can remove the painter’s tape from around the edges of the new tile, once the grout completely sets.
After completing all this work, now wait for at least 24 hours before walking on the floor. Make sure to keep it from becoming wet until the tile properly sets.
Hope you find this article useful. If you are about to sell, buy, or rent any real estate materials, you can always visit basobaas.com.
To real more blog like this. Click here. Don’t forget to share in your socials


